

 Français
Converting a CSV to Excel Without Losing Data
Learn how to convert a CSV to Excel effortlessly. Our guide solves encoding (UTF-8), separator, and format issues for flawless imports.

Opening a CSV file in Excel. In theory, a simple double-click should do the trick. In practice, it’s often the start of a real headache: a perfectly clear sales report turns into a jumble of data where every column gets mixed up and the numbers become incomprehensible.
Why converting CSV to Excel is a daily struggle

If you run an online store, you know that handling CSV files is part of the job. Whether you’re analyzing an order export from Shopify, a financial report from Stripe, or a list of Amazon transactions, these files sit at the heart of how you steer your business. Yet the operation all too often ends in frustration.
And rest assured, you’re not alone. We’ve all had that moment when columns merge into one, when accents and special characters turn into strange symbols, or when postal codes lose their leading zero. These are the classic symptoms of a CSV to Excel conversion gone wrong.
The business consequences of a bad import
These issues aren’t just minor technical glitches. They have a very real, and sometimes costly, impact on your business. One misinterpreted piece of data, and your entire analysis is thrown off.
Think, for example, of decimal amounts that, once misread, can completely distort a profitability analysis. Or dates that become unreadable, preventing you from tracking your sales performance over a given period correctly.
The biggest risk is the impact on your bookkeeping. Corrupted sales data leads to inaccurate VAT returns. That opens the door to tax risks, especially if you sell internationally through the OSS/IOSS schemes.
This is a reality for a huge number of businesses. In France, more than 54% of small businesses, including in e-commerce, still use Excel for their bookkeeping. For sellers on Amazon FBA or Cdiscount, this translates into hours spent trying to convert CSV files. In fact, 70% of e-commerce SMEs admit to making manual data-entry errors in their spreadsheets, which causes considerable time loss.
To help you better picture these everyday hassles, here’s a summary of the most common problems and their direct consequences:
| Common problem | Appearance in Excel | Consequence for your business |
|---|---|---|
| Wrong separator | All the data sits in column A. | Unusable file, wasted time putting everything back in order. |
| Encoding issue (UTF-8) | Accented characters (é, à, ç) are replaced by symbols (, é). | Unreadable customer or product names, impossible data analysis. |
| Number formatting | Prices (19.99) turn into dates (Sept-19). | Distorted financial analysis, margin calculation errors. |
| Loss of leading zeros | A postal code “01500” becomes “1500”. | Shipping errors, customer segmentation problems. |
These examples show clearly that mastering data import isn’t optional — it’s a necessity.
This guide was designed to give you a method you can finally rely on. We’re going well beyond a simple “File > Open”. The idea is to show you how to prepare your data upstream. To go further, you can read our article on best practices for exporting your data as CSV.
By mastering CSV to Excel conversion, you don’t just save time. You secure the reliability of your analyses and your bookkeeping. It’s a key skill for any entrepreneur who wants to run their business on solid ground.
The manual method for a flawless CSV import into Excel
Let’s look together at how to do this properly, once and for all. The first reflex, the one we all have, is to double-click the CSV file. Whatever you do, don’t do that. It’s the fastest route to unreadable data and hours of cleanup.
For a clean, reliable import, the solution lies in Excel’s data import tool. It’s a bit hidden, but it’s what gives you full control over how the software reads your file. Instead of letting Excel guess (and get it wrong most of the time), you’re the one setting the rules. It’s the only way to guarantee that your accents, numbers, and product IDs aren’t mangled on arrival.
First reflex: UTF-8 encoding to save your accents
The starting point, and the most critical one, is encoding. This is where the survival of all your special characters is decided. Nearly all modern exports (from Shopify, Stripe, your CRM…) use UTF-8 encoding. It’s the standard for handling characters from around the world.
The trap? Excel, especially older versions, doesn’t always assume your file is in UTF-8. The result, which you’ve probably already seen: “é” characters turning into “é”, and columns of names or products turning into unreadable gibberish.
To avoid this carnage, the method is simple:
- First open a blank Excel sheet. Never start from the CSV file itself.
- Go to the Data tab, then in the “Get & Transform Data” section, click From Text/CSV.
- Choose your file. A preview window will open.
This preview window is where everything happens. Look carefully at the “File Origin” line.
Make absolutely sure the selected option is 65001: Unicode (UTF-8). If Excel suggests something else, change it manually. This one simple setting resolves 99% of accent and strange-symbol issues.
Choosing the right delimiter
Encoding is set, your accents are back. Great. Now you need to handle the structure. The delimiter is the character that tells Excel where one column ends and the next begins.
The most common ones are:
- The comma (,): the international standard, used by most American platforms.
- The semicolon (;): the favorite of French-language versions of Excel.
- The tab: another common separator, but invisible.
In the preview window, Excel tries to guess the right one. If your columns are already neatly split in the preview, it got it right. If everything is still lumped into a single column, try the other options in the “Delimiter” dropdown menu until the structure is correct. A Shopify order export, for example, almost always uses the comma.
Pre-formatting columns to avoid the traps
We’ve reached the final step — the one many people skip, and yet it saves a huge amount of time. The preview shows your data neatly arranged in columns. You can (and should!) click each column header to set its data format before finalizing the import.
This step is vital for all the data Excel tends to misinterpret.
Scenario 1: postal codes starting with a zero You’re importing a customer list and the “postal_code” column contains “01500” or “08000”. By default, Excel will see this as a number and strip the leading zero. Result: you end up with “1500” and “8000”, incorrect postal codes.
- The fix: Click the header of the postal code column and, under “Data Type”, choose Text. Excel will then treat these values as a plain string and keep the zero.
Scenario 2: temperamental date formats Your export has dates in French Day/Month/Year (DMY) format, like “25/12/2023”. But if your computer is set to English (US), Excel expects Month/Day/Year (MDY). It may transform your dates, invalidate some of them, or swap them around.
- The fix: Select the date column, choose the Date format, then make sure to specify the correct order (DMY in this case).
Do the same for all sensitive columns: product IDs, phone numbers, EANs… Once everything is properly configured, click “Load”. And there you go. You get a clean Excel table, perfectly formatted and ready to use. The few minutes invested upfront will save you hours of manual corrections.
Automating your CSV imports with Power Query
If you regularly process the same CSV files — a weekly sales report, a monthly customer export — you know how quickly manual importing can become a tedious ritual. Even when you’re efficient, repeating the same clicks is a waste of time.
That’s where Power Query changes the game. Forget the idea of a simple tool: it’s a genuine automation engine built into Excel. The principle is remarkably simple: you show Excel once how to process a type of file, and it will remember it for every time after that.
Setting up your first query
Let’s take a concrete example: you sell on Amazon and download your sales report every week. The file structure is always the same. Every time, you have to set the encoding, specify the separator, remove unnecessary columns, then format the dates and numbers. This is the perfect scenario for automation.
Instead of starting this process over endlessly, let’s set up a query that will handle it for you.
From an Excel workbook, go to the Data tab, then click From Text/CSV. Choose your source file, for example your latest Amazon sales report.
A preview window opens, which looks a lot like the classic import wizard. But the difference is crucial: instead of “Load”ing the data directly, click the Transform Data button. This opens the door to Power Query.
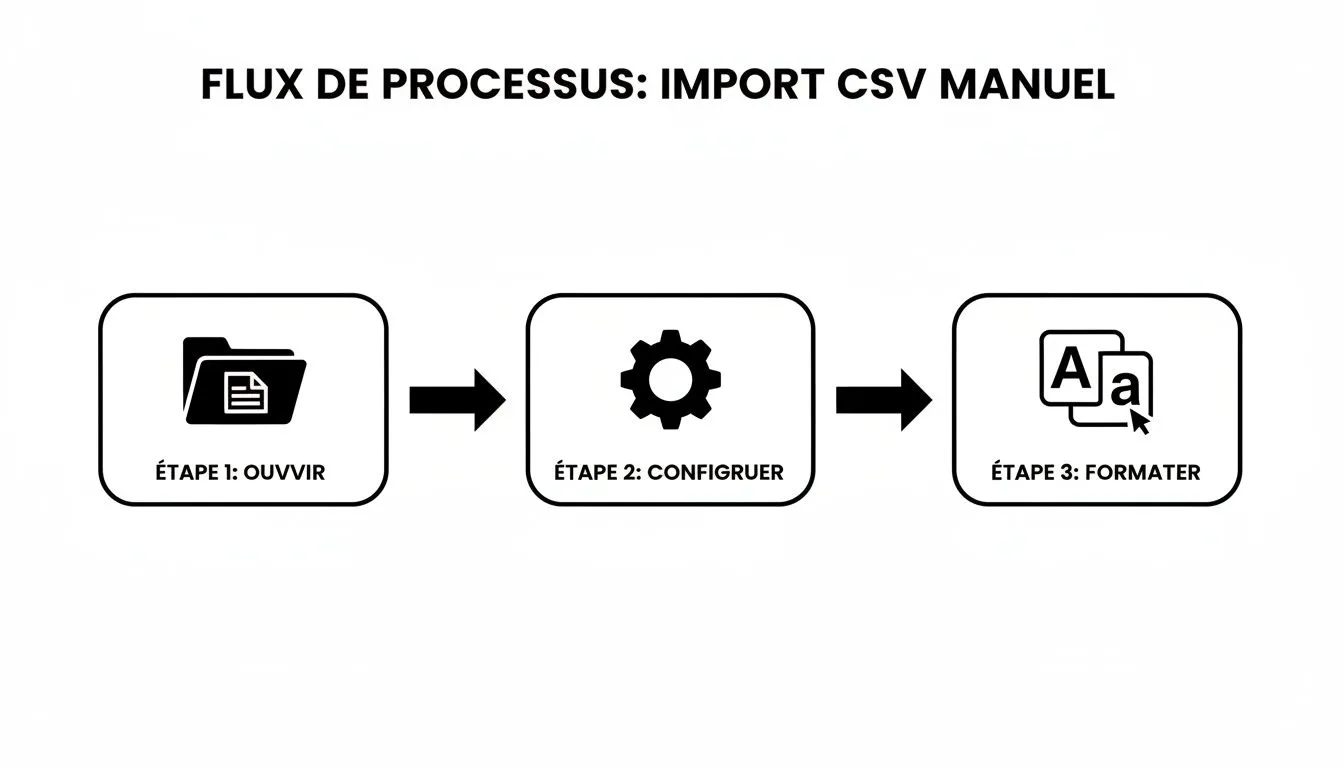
This diagram perfectly illustrates the repetitive work that Power Query will now do on your behalf.
The Power Query editor: your data-cleaning studio
You’re now in the Power Query editor. This is your new control tower. On the right, a panel called “Applied Steps” will record every single action you take, building your automation scenario as you go.
- Initial settings: The first step, “Source”, lets you check and correct the encoding (choose UTF-8) and the delimiter (comma, semicolon, etc.).
- Cleaning up columns: Have columns that serve no purpose? Select them and simply press the
Deletekey on your keyboard. The step is recorded. - Formatting data: For each column, click the icon to the left of the title (e.g. “ABC”, “123”) to set the right format. Set postal codes to Text, prices to Decimal Number, and order dates to Date.
Every click is a recorded instruction. Once everything is clean and tidy, click Close & Load. Your data appears in a new Excel sheet, perfectly formatted in a structured table.
The real magic happens next. Next week, download your new sales report, save it in the same location with the same name to replace the old one. Open your Excel file, go to Data > Refresh All. In a few seconds, all your cleanup steps are reapplied. That’s it.
This isn’t a small time saver. A recent study showed that 28.3% of French accountants waste up to 20 hours a month reformatting files. For platforms like Paddle or PayPal, VAT errors caused by poor data handling can reach 25%.
Going further: importing every file in a folder
What if we pushed automation even further? Instead of overwriting your report every week, you might want to keep a history. Power Query can connect not just to a single file, but to an entire folder.
The process is very similar:
- Go to Data > Get Data > From File > From Folder.
- Select the folder where you archive all your CSV reports.
Power Query will then scan the folder and combine every CSV file it contains into one large table. You can then apply exactly the same cleanup steps as before. From now on, every time you add a new report to that folder, a simple click on “Refresh All” will update your entire dashboard.
We go from a simple CSV to Excel conversion to a genuine automated data pipeline.
Automation doesn’t stop there. Once your data is clean and up to date, it can feed pivot tables, charts, and dashboards that will themselves update automatically. To take things a step further, particularly around bookkeeping and VAT, dedicated solutions can take over. Explore, for example, the integrations offered by Bizyness for a level of automation where even importing data becomes unnecessary.
Beyond CSV conversion: toward truly accurate e-commerce bookkeeping
Knowing how to juggle CSV files and turn them into clean Excel sheets, whether by hand or via Power Query, is an undeniable skill. But let’s be clear: it’s often a solution to a problem that shouldn’t even exist. Once your data is in order, the real bookkeeping marathon has only just begun.
A simple export of your Shopify sales, even converted flawlessly, falls far short of what’s needed for e-commerce bookkeeping that actually holds up. It’s nothing more than a list of raw transactions. To make it truly usable, you need to enrich it, break it down, and reconcile it with payments — painstaking work that is not only time-consuming but also riddled with risk.
The gap between a sales export and an accounting entry
Think of your sales CSV file as the starting point. The accounting entry is the finish line. Between the two lies an obstacle course that many online sellers underestimate. Your export is far from telling you everything.
It’s missing critical information that you’ll have to reconstruct manually in your spreadsheet:
- Detailed VAT breakdown: Your export gives you a total tax amount. For your bookkeeping, it needs to be broken down by rate (20%, 10%, 5.5%…).
- Revenue distinction: Product sales, shipping fees charged to the customer, or services like gift wrapping must be posted to separate revenue accounts.
- Gift card handling: An order paid for with a gift card is not immediate revenue. It’s the repayment of a debt you owed the customer, and it requires very specific accounting treatment.
Each of these steps forces you to create new columns in Excel, write sometimes complex formulas, and above all, hope you don’t make a single mistake.
The headache of international VAT and the One-Stop Shop (OSS/IOSS)
If you sell internationally within the European Union, your simple CSV export can quickly become a ticking time bomb for your tax compliance. With the arrival of the VAT One-Stop Shop (OSS/IOSS), you’re required to report VAT in every destination country of your customers.
Imagine doing this by hand in Excel. You’d first have to isolate sales for Germany, then Italy, Spain, Ireland… Then, for each country, apply the correct local VAT rate and calculate the amount to declare. It’s a colossal task and a near-guaranteed source of errors.
A Shopify sales export simply isn’t structured to fill out your OSS return. You’ll spend hours filtering, sorting, and calculating, with the constant risk of missing a sale or applying the wrong rate.
This workload is anything but trivial. For an online seller trading internationally, simply managing VAT through the IOSS scheme from a Stripe CSV can take up to 15 hours a week. Errors in tracking the €10,000 OSS threshold are common and affect 18% of cases. You can read more about the impact of these manual processes on productivity.
The missing link: reconciling with payment platforms
The other major weakness of your sales file is that it doesn’t show what you actually receive. Stripe, PayPal, and other payment platforms deduct their fees from every transaction.
For sound bookkeeping, you need to reconcile every sale with the amount that actually lands in your account, while isolating the fees deducted. This means downloading another type of CSV report (your payment processor’s) and cross-referencing it with your sales export. In Excel, that translates into formulas like VLOOKUP or INDEX(MATCH), notorious for being slow and unreliable.
Converting CSV to Excel is therefore only the very first step of a long tunnel. It’s a band-aid on a wooden leg. The real solution is to break free entirely from this dependence on manual exports.
Tools like Bizyness were built exactly for this. By connecting directly to your sales platforms (Shopify, Amazon…) and payment platforms (Stripe, PayPal), they automate this entire process.
| Manual task in Excel | Automation with Bizyness |
|---|---|
| Manual import and CSV cleanup | Direct API connection, no import needed. |
| VAT breakdown by rate | Automatic application of the correct VAT rates per product. |
| OSS return calculation and preparation | Automatic generation of the OSS report, ready to file. |
| Reconciling Stripe/PayPal fees | Automatic reconciliation of sales and fees. |
The goal is no longer to become an expert in file manipulation, but to let technology handle the complexity. You can finally focus on analyzing reliable numbers, rather than laboriously preparing them. Your time is far better spent driving your growth than fighting with spreadsheets.
Practical tips and mistakes to avoid

Mastering CSV to Excel conversion isn’t rocket science. It’s mostly a matter of method and experience in knowing where the pitfalls hide. To spare you the headaches I’ve been through myself, here are a few field-tested habits and tricks that make all the difference.
Think of this list as a quick check-up before you get started. Each point addresses a very concrete problem that everyone, especially in e-commerce, eventually runs into.
Best practices for a smooth import
A few simple habits can save you enormous amounts of time and guarantee the reliability of your data. These aren’t advanced techniques, just simple precautions that change everything.
Here are the reflexes to adopt right away:
- Always back up the original. Before touching anything, make a copy of your raw CSV. It’s your safety net. If something goes wrong, no panic — you can go back to the clean source without having to redownload everything.
- Check the file size before importing. A CSV file of 0 or 1 KB? Be suspicious. It’s probably empty or corrupted. A quick glance in your file explorer can save you hours of chasing an error that doesn’t exist.
- Forget the double-click. As we’ve seen, it’s the worst way to open a CSV. Get into the habit of always going through the import wizard (Data > From Text/CSV). It’s the only way to keep full control.
- Watch out for date formats. A US export will give you a date like “12/09/2023” for December 9th. Your French Excel will read it as September 12th. During import, it’s up to you to specify the correct format (DMY, MDY…) so the conversion is accurate.
Never underestimate the power of the preview in the import wizard. Take 5 seconds to check that the encoding is indeed UTF-8, that the separator correctly splits your columns, and that the data looks consistent. It’s the most worthwhile check you’ll make all day.
Common mistakes to never make again
Knowing what to do is good. Knowing what to avoid is even better. Some mistakes are so classic they’re made almost on reflex. Knowing them is the first step to eliminating them for good.
Mistake number one is blindly trusting Excel. The software tries to be clever, but its automatic guesses are often a disaster for your data. It’s up to you to tell it what to do, not the other way around.
Here are the traps to absolutely avoid:
- Ignoring column data types. This is the most destructive mistake. If you don’t specify that postal codes, phone numbers, or EANs are Text, Excel converts them to numbers. Result: leading zeros in postal codes disappear, and long product IDs turn into scientific notation (e.g. 3.40E+12), making the data completely unusable.
- Saving an Excel file as CSV by mistake. This is the silent disaster. You’ve spent hours on your .xlsx file, with formulas, charts, pivot tables… Then you hit “Save” a bit too quickly, without noticing the default format is “CSV”. In one click, everything is lost. CSV keeps only plain text: goodbye formulas, formatting, and sheet tabs. For good.
- Working directly on the raw export. Never edit the CSV file you just downloaded directly. The right approach is to import it into a “master” Excel file that serves as your template. This way, you keep the raw data (the CSV) separate from your analysis work (the XLSX). This discipline is essential, especially if you’re aiming to keep sound bookkeeping in Excel.
FAQ: frequently asked questions about converting CSV to Excel
Going from a CSV to a clean Excel file is often more complicated than it looks. Between separators sowing chaos and formats rebelling, you can quickly lose your time and your patience. Here are field-tested answers to the most common problems, to help you avoid the classic pitfalls.
How do I handle a CSV that mixes commas and semicolons?
Ah, the great classic! A CSV file that looks like a battlefield because it uses both commas and semicolons as separators. This often happens when a text column, such as a product description, contains commas while the file’s main separator is supposed to be the semicolon. Opening this directly in Excel is a guaranteed disaster.
The only truly reliable method is to prepare the file before even thinking about Excel.
Forget Windows Notepad. Open your CSV with a more serious text editor, such as Notepad++ or Sublime Text. They handle encoding and formatting quirks far better.
The trick is to use “Find and Replace” intelligently. Imagine the real column separator is the semicolon. The idea is to temporarily isolate that real separator. First replace every semicolon with a character that never appears in your file, such as the pipe | or the tilde ~. Once that’s done, you can deal with or fix the stray commas. Then simply replace your | with a semicolon, and your file is clean.
After this quick cleanup, Excel’s import wizard or Power Query will read your file without a hitch.
Why do my decimal numbers turn into dates?
You import a price file, and all your 19.99 values have turned into September 19… This is a sign of a cultural clash between your file and your Excel. Your Excel, set to French, expects a comma for decimals (19,99). The CSV, on the other hand, often uses a period, the Anglo-Saxon way. For Excel, a number followed by a period and then another number looks like a date.
Don’t fall into the trap of “Find and Replace” after importing. By then, it’s too late: the information is already corrupted. The fix must happen during the import.
The solution is simple, but you need to know where it’s hidden. It’s tucked away in the import options.
- Go to Data > From Text/CSV.
- When the data preview appears, don’t rush to click “Load”. Click Transform Data. You’re now in the Power Query editor.
- Select the column or columns causing trouble. At the top of the column, click the data type icon (often “ABC” or “123”).
- Choose the magic option: Using Locale.
- A new window opens. Tell Excel that for this column, the Data Type is “Decimal Number” and the Locale of the source file is “English (United States)”.
And there you have it! Power Query will now know that the period is a decimal separator, not part of a date. Your numbers are saved.
My CSV has more than a million rows, and Excel refuses to open it!
You’ve just hit Excel’s wall: its limit of 1,048,576 rows per sheet. If you try to open a larger file, Excel will simply cut off whatever exceeds that limit, without even warning you. You then risk working on incomplete data while thinking you have it all.
For volumes like this, the only serious approach is Power Query. The tool doesn’t naively load the entire file into memory. It connects to it like a database. That changes everything. You can filter, sort, and even aggregate your millions of rows before displaying them in your spreadsheet.
For example, instead of importing 5 years of transactions, you can ask Power Query to directly calculate total sales by month. The result? A clean table of a few dozen or a few hundred rows that fits perfectly in Excel, while still drawing on the entirety of your raw data.
Turning CSV files into usable Excel files is often just the first step of a long accounting journey. If you’re tired of juggling separators and formats, know that there’s a way to automate all of it. With Bizyness, you connect your stores and payment methods directly. The platform takes care of automatically turning your sales data into flawless accounting entries, without you ever having to open a single CSV. To put an end to manual bookkeeping, take a look at https://www.bizyness.fr.
