

 Français
Managing your CSV file in Excel without losing data
Learn how to import a CSV file into Excel without errors. A guide for online sellers to master formats, separators and complex data.

To convert a CSV file to Excel, the fastest method seems to be opening it directly. Yet this approach is often a source of frustration, especially when working with exports from e-commerce platforms. The most reliable technique, and the one I recommend, goes through the Import Data > From Text/CSV tool.
Why importing CSV into Excel is a real challenge for e-commerce
If you run an online store, you know that exports from Shopify, Amazon or Stripe are part of your routine. These CSV files are a goldmine for analyzing your business, but importing them correctly into Excel can sometimes feel like an obstacle course. If the concept of a CSV file still seems a bit fuzzy, this definition of a CSV file will clarify its simple but strict structure.
The real problem? A shifted column, an unreadable date or a truncated product code isn’t just a minor bug. It’s a direct obstacle that skews your analysis and prevents you from making the right decisions.
The very concrete impact of a conversion gone wrong
A failed data import has real consequences. Imagine calculating your profitability with wrong prices, or preparing your bookkeeping with made-up amounts. That’s the best way to go completely off track.
Here are some of the problems you’ll run into all the time:
- Merged columns: The wrong separator (a comma instead of a semicolon, for example) and suddenly all your data ends up crammed into a single column.
- Loss of leading zeros: Your EAN codes or postal codes starting with “0” are read as numbers by Excel, which strips that precious first zero.
- Dates that make no sense: American date formats (MM/DD/YYYY) are often misread by an Excel configured for another region, which invalidates any time-based analysis.
Knowing how to import this data properly is all the more crucial since Excel remains the tool of choice for many businesses. In the accounting sector, for example, more than 28.3% of professionals in France use it daily. That shows how important it is.
Knowing how to cleanly import a CSV file into Excel isn’t just a technical trick. It’s the foundation for guaranteeing the reliability of your analyses and the rigor of your bookkeeping — two essential pillars for running an e-commerce business with peace of mind.
This guide will show you, with concrete examples, how to turn this chore into a skill that saves you time and stress. And if you want to go further, take a look at our tips on exporting data to CSV.
The different methods for importing a CSV into Excel
To go from a CSV file to Excel, several paths are available to you. The right choice mostly depends on the nature of your file and how often you need to do this task. Let’s go through the options, from the most direct to the most elaborate.
The first instinct is often the simplest: double-click the CSV file, or right-click to open it directly with Excel. Honestly, for a small, no-frills contact list, that can do the job. It’s instant.
But in the world of e-commerce, with order exports coming from platforms like Shopify or Amazon, this method quickly shows its limits. Excel improvises, and it’s rarely a success. You quickly end up with merged columns, unrecognizable dates, or product codes that lose their zeros. In short, a real mess.
The reliable method: the text import wizard
When the double-click has let you down, the Import Data > From Text/CSV tool becomes your best friend. It’s the method that gives you back control. You’re the one dictating the rules to Excel, not the other way around.
Going through this route, Excel shows you a preview window and asks for your input on the file’s structure. That’s where everything is decided.
The import wizard is your control tower. It lets you guide Excel to read the data correctly, instead of letting it guess. That’s what makes all the difference in getting a clean table, ready for analysis.
This approach is perfect for fixing the two usual culprits: the delimiter (the famous comma or semicolon) and the character encoding (goodbye strange symbols). For an online seller, mastering these two settings alone solves more than 80% of common import problems.
To visualize the problem, here’s a diagram illustrating why directly opening an e-commerce export in Excel is often a bad idea.
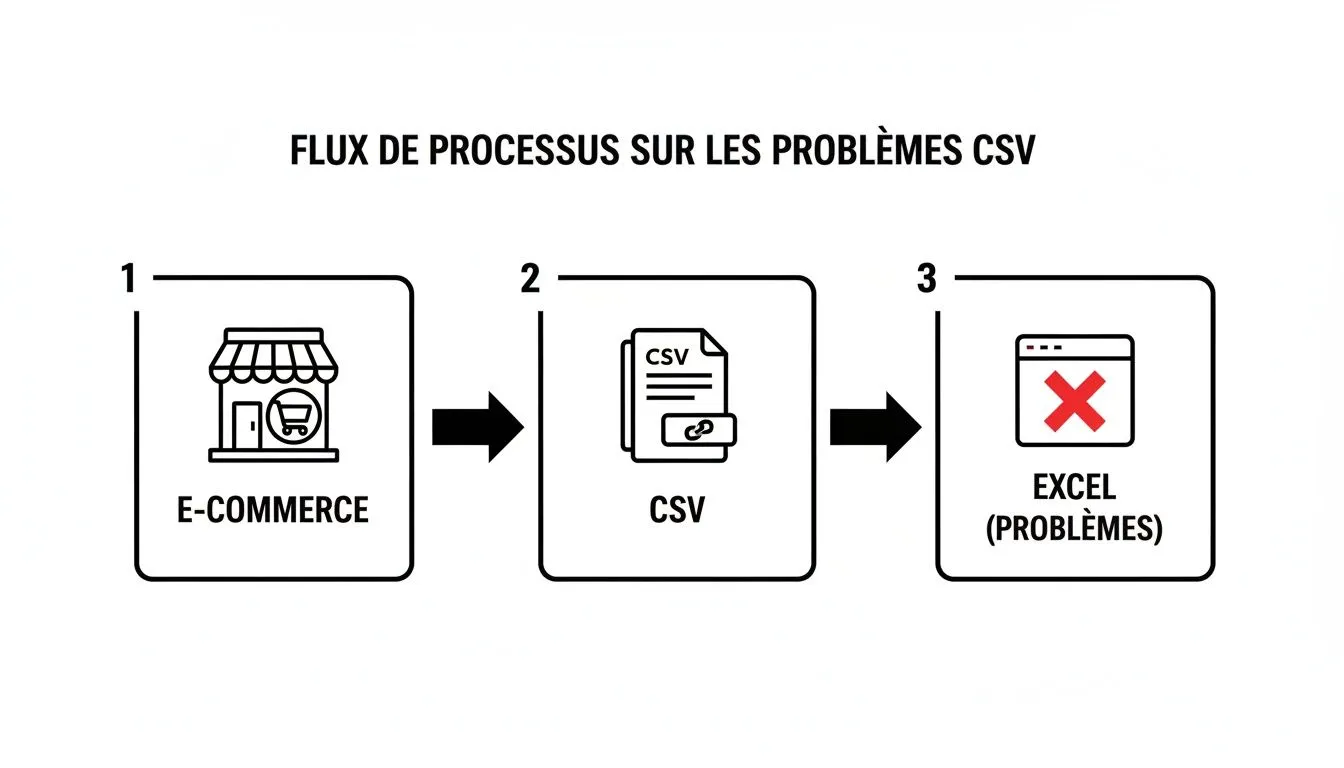
As you can see, the direct path is often riddled with pitfalls. The import wizard is the bridge that lets you get around these obstacles.
By the way, before importing, you naturally need to have the file. There are many ways to create them; for example, it’s fairly simple to export contacts to a CSV file from a phone, a common task before integrating them into another system.
Power Query: the solution for complex, recurring imports
If you juggle sales exports, product lists or transaction statements every month, it’s time to discover Power Query. It’s the tool built into Excel designed for automation.
Think of Power Query as a smart recorder. You show it once how to clean and organize a type of file (for example, your monthly sales export), and it remembers. Next time, a single click will do.
The benefits are huge for anyone who regularly deals with data:
- Automation: No more repetitive manipulation. Once the query is set up, all you have to do is refresh it to process the new file. It’s a phenomenal time saver.
- Reliability: The cleaning steps are always identical. Your data is therefore perfectly consistent from one report to the next.
- Power: Power Query swallows large files without flinching and performs complex transformations that would be a nightmare to do by hand, such as splitting columns, merging tables or calculating new metrics.
For example, if your exports contain a “Full Address” column, you can set up a query that automatically splits it into “Street”, “City” and “Postal Code” with every import.
To help you see things more clearly, here’s a table comparing the three approaches.
Comparison of CSV import methods in Excel
This table compares the three main methods for importing a CSV file into Excel, highlighting their speed, reliability and ideal use case.
| Method | Speed | Reliability | Ideal for… |
|---|---|---|---|
| Double-click / Open | Instant | Low | Very simple files, with no complex formats or ambiguous separators. |
| Import wizard | Fast | High | One-off imports of complex files (e-commerce, databases) requiring control over the delimiter, encoding and data types. |
| Power Query | Moderate (initially) | Maximum | Repetitive tasks, monthly imports, cleaning and transforming complex data, report automation. |
In summary, the choice of method is made case by case. For a one-off need, even on a somewhat complex file, the import wizard is perfect. To gain productivity and make your recurring reports more reliable, taking the time to master Power Query is without doubt the best investment you can make.
Solving the most common import problems

Even when following the import method to the letter, you often run into small persistent glitches when trying to turn a CSV file into Excel. It’s frustrating, but fortunately, every problem has a solution. These errors almost always come from the same thing: Excel trying to be too clever.
The spreadsheet tries to guess the format of each column to save you time. The trouble is, its guesses are often off the mark, especially with specific data like that from e-commerce. That’s where you need to take back control.
Whether you use the classic import wizard or Power Query, never skip the preview step. It’s your one and only chance to tell Excel how to handle each column before it wrecks your data.
Leading zeros disappearing
This is the classic case, the one that’s driven generations of users crazy. You import a customer list and your postal codes like “01000” or “06200” turn into “1000” and “6200”. The same drama happens with EAN barcodes or phone numbers.
The cause is quite simple: Excel sees a series of digits, thinks “that’s a number!” and applies mathematical rules. And in math, a leading zero serves no purpose, so it removes it.
The fix is simple: you need to force the Text format for the columns in question, and do so during import.
- With the import wizard: At the last step, click the column header (e.g. “Postal_Code”), then check the “Text” box in the “Column data format” section.
- In Power Query: It’s even simpler. Click the data type icon in the column header (usually “123”) and choose “Text”.
By doing this, you’re clearly telling Excel: “Don’t touch this. Treat this data as a string of characters, without interpreting it.”
Dates displaying in the wrong format
Here’s another well-known headache. Your Shopify export gives you dates in American format (MM/DD/YYYY), but your local version of Excel expects DD/MM/YYYY. As a result, the date of April 8, 2023 (“04/08/2023”) gets read as August 4, 2023. Your seasonality analyses are completely thrown off.
Here too, everything is decided at the moment of import. You simply need to tell Excel the original format of the date.
Telling Excel the correct date format is like giving it the right key to decode information. Without it, the data is either unreadable or, worse, misinterpreted.
In the import wizard, once your date column is selected, you’ll find an option to specify the original format (for example, “MDY” for Month/Day/Year). Excel will then convert it correctly according to your PC’s settings.
Decimal separator conflicts
Another classic that hits your wallet directly: prices. Your CSV file uses a period as the decimal separator (for example, “49.99”), but your Excel configured for another region expects a comma (“49,99”). At best, Excel treats “49.99” as text, making any calculation impossible. At worst, it interprets it as some obscure date.
The fastest solution, if the import is already done, is the “Replace” function (shortcut CTRL+H).
- Select your price column.
- In the “Find” field, type a period (
.). - In “Replace with”, type a comma (
,). - Click “Replace All”, and you’re done.
If you’re in Power Query, you can automate this using the “Replace Values” option or, even better, by changing the data type “Using Locale”. You can then specify that the source uses the English (United States) format, and Power Query will handle the conversion.
Special characters turning into hieroglyphics
You open your file and there’s the drama: all the accented letters and ”€” symbols are replaced by black diamonds with a question mark (). This is the typical symptom of an encoding problem.
Today, most systems export in UTF-8, a universal standard that handles nearly all characters in the world. The problem is that older versions of Excel, or sometimes even more recent ones depending on the settings, may expect a different format.
When you import via Data > From Text/CSV, the modern wizard offers a “File Origin” option. Check that it’s set to 65001: Unicode (UTF-8). That’s the magic fix that solves this problem in more than 95% of cases.
This little technical trick is also useful well beyond your e-commerce exports. For example, France’s national statistics institute (INSEE) provides tons of data on French municipalities in CSV format. To use it and cross-reference it with your own sales figures, it’s crucial to know how to properly convert a CSV file to Excel. This could help you spot high-potential geographic areas for your business. If that interests you, take a look at the vast catalog of public data available on the INSEE portal.
Automating your CSV imports for e-commerce bookkeeping

If you’re an online seller, a ritual is probably familiar to you: every month, you download the same Amazon sales reports, the same PayPal or Shopify statements, and you go through the same steps to import them into Excel. It’s repetitive, tedious and error-prone.
What if we put an end to this cycle? The solution is already in your Excel software: it’s called Power Query. This tool is designed to save you a huge amount of time. The principle is simple: you show it once how to clean and transform a CSV file, and it will remember for every time after that.
Create your first automation query with Power Query
Rather than targeting a single file, the magic of automation happens by targeting an entire folder on your computer. Imagine a folder on your desktop that you name, for example, “Monthly Sales Exports”. That’s where you’ll drop your future files.
Setting it up is fairly simple:
- In the Excel ribbon, go to the Data tab, then click Get Data > From File > From Folder.
- Simply point Excel to the location of the folder you just created.
- A window opens, listing the files present. That’s where you’ll choose the Combine & Transform option.
Power Query will then ask you to show it how to process the data based on a first file as an example. This is exactly when you apply all the corrections you used to make by hand: renaming columns, filtering out unnecessary rows, fixing date or number formats, and so on.
Once the Power Query is set up, your monthly routine will change radically. All you’ll need to do is drop your new CSV export into the dedicated folder, open your Excel file and click “Refresh”. That’s it. The report updates instantly, with all the transformations already applied.
We’re talking about turning hours of work into a few seconds. It’s a real turning point in managing your data.
Make your work last by creating a template
To go even further, turn your Excel file into a reusable template. When saving, don’t use the usual .xlsx format, but instead choose Excel Template (.xltx).
Thanks to this, every time you open this template, you’ll start from a clean base, with your data connection already set up. No more risk of overwriting last month’s file.
The benefits are immediate and concrete:
- Massive time savings: What used to take hours now only takes a few clicks.
- Rock-solid reliability: By removing manual manipulation, you eliminate nearly 90% of the risk of human error.
- Standardized process: All your reports share the same structure, which guarantees consistency over time.
This is an excellent first step toward more robust processes. To explore this topic further, I invite you to read our article on business process automation, which can transform many other aspects of your business.
However, we need to stay realistic. This automation via Excel, while powerful, has its limits. Maintaining queries can become a headache if export formats change, and the process still depends on a manual action (dropping the file, then clicking “Refresh”). This is exactly where specialized accounting tools take over, completely removing these intermediate steps.
Going beyond CSV: fully automated bookkeeping
Mastering CSV file imports into Excel is a very useful skill, no one would deny that. It’s perfect for analyzing your data on an ad-hoc basis. But let’s be honest: as an entrepreneur, your real goal is to free yourself from repetitive tasks so you can focus on what really matters — growing your business.
Even with a tool as powerful as Power Query, Excel has its limits. Manually handling files, even when optimized, remains an open door to errors and, above all, a waste of precious time.
Putting an end to manual exports
This is where specialized platforms like Bizyness completely change the game. Imagine for a moment never having to download, clean or import a single CSV file again. The process becomes completely invisible, built into your business.
Bizyness connects directly to your sales channels (like Shopify, Amazon or Stripe) to retrieve your order data in real time. All without you having to lift a finger.
The CSV file then becomes a distant memory. It’s replaced by a continuous, secure and intelligent data flow. You gain compliance, sure, but above all you gain peace of mind to focus on what matters: selling.
This isn’t just simple automation. The platform goes much further: it automatically generates compliant invoices for your customers, applies the correct VAT rates based on the country, and prepares accounting entries already ready for your accountant.
From data flow to turnkey bookkeeping
Rather than juggling spreadsheets, you run your business with a clear, always up-to-date financial view. Fully automating data collection and processing radically transforms your day-to-day management.
The benefits are very concrete:
- Maximum reliability: No more copy-paste errors, unpredictable formats or oversights. Every sale is processed with the same rigor, systematically.
- Guaranteed compliance: The system handles the complexity of VAT for you, including specific international rules (OSS/IOSS). You no longer have to worry about it.
- Simplified collaboration: Your accountant receives perfectly structured data, ready to use. Your exchanges become much smoother and more efficient.
For any entrepreneur, choosing the right accounting software for sole traders is a decisive step toward growing and becoming more professional. Moving on from Excel ultimately means going from a simple calculation tool to a genuine financial management system.
Going further: answers to frequently asked questions about CSV import
Even with the right methods, a few special cases can still give you trouble. Let’s go through the questions that come up most often in the field to help you resolve any situation.
How do I force the semicolon as the default separator?
Tired of having to specify the delimiter every time you open a file? This is a common frustration. You’d like to be able to fix this once and for all directly in Excel, but the solution lies elsewhere.
This behavior is actually dictated by your operating system’s regional settings, whether on Windows or macOS. For Excel to natively open CSVs with a semicolon on double-click, you need to change the “list separator” in your computer’s language and format options. Once this system setting is changed, Excel will follow the new rule.
What if my CSV file is too large for Excel?
This is the classic scenario with an e-commerce catalog export or an order history spanning several years: the file exceeds Excel’s famous limit of 1,048,576 rows.
The worst mistake would be trying to open it directly. The best approach is to use Power Query, but intelligently. When importing, instead of loading the data into a sheet, choose the “Only Create Connection” option. Also remember to check the “Add this data to the Data Model” box.
This technique hands the work off to Power Pivot, Excel’s built-in analysis engine, capable of handling millions of rows without crashing your machine. You can then build your pivot tables from this data model, without ever displaying all the rows at once.
Can Excel connect to an online CSV file?
Absolutely! Imagine a stock report updated every hour and accessible via a simple URL. No need to download it manually every time.
Use the Data > From Web feature. Simply paste the URL of your CSV file. Excel will establish a direct connection, and you’ll be able to refresh all the data with a single click of the “Refresh All” button.
A CSV file is raw, universal data, a bit like a list of ingredients on a notepad. An XLSX file is the finished dish: it contains not only the ingredients (your data), but also the entire recipe (your formulas, formatting, charts and data connections).
Understanding this difference is fundamental. Once you’re done working, saving your file as .xlsx is the only way to preserve all the cleaning, calculations and formatting you’ve done. If you save it back as CSV, you’ll lose all that work and keep only the raw text.
Mastering these techniques is already a giant step toward more efficient data management. But to completely remove the mental load of manual imports, the next step is automation. That’s exactly where Bizyness comes in, connecting directly to your sales tools to consolidate your data without you having to lift a finger.
Take it to the next level at https://www.bizyness.fr.
